I have to say, I really have a sense of accomplishment with this Robin costume I'm making. I've never made my own costume before. For those aforementioned Halloweens my mom's helped me make a costumer (and by "help" I mean "sewn herself") so this is a nice change. More than nice, it's great. I'm doing this on my own.
It may not be much, but I'm going in baby-steps here. The next step in the Girl Wonder project is the top. Pretty simple and I finally got to use my sewing machine!
I'll just take this moment to say that I found all of the shirts and fabric I use/will be using at thrift stores. They're an amazing resource for that kind of thing but remember to wash everything before using it. You just never know.
Needed:
- Green t-shirt
- Red t-shirt
- Scissors
- Sharpie
- Pencil
- Yellow craft foam
- circle to trace: I chose a cup
- Pins (not pictured)
- Sewing machine (not pictured)
I'm going to point out that when I assembled all of my materials for this project I had already taken off the sleeves of the red shirt with a seam ripper.
Let's get to it! The first thing I got out of the way was the emblem. I traced and cut out a circle. Not high on the difficult scale. I drew the "R" and colored away with that sharpie. I love sharpies, I use them for most projects. I also cut out three strips for the "buttons."
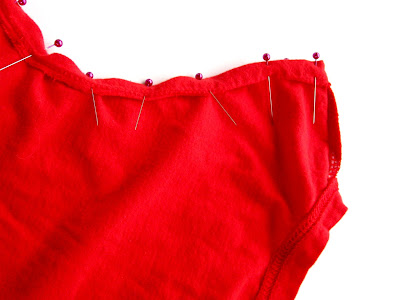
So that the easy part is taken care of, those gaping holes where sleeves use to be on that red shirt are looking kind of sloppy. I decided to make it a little neater and hem them up a bit. Pin first, ask questions later.
Pink pins were the natural choice for me, of course. By the way, I know this will make me sound like a total sewing newbie but I am so here it goes: there are so many types of pins! It took me five minutes in the store just trying to find some for basic sewing needs. No one saw me, thank goodness.
Now it is time... for sewing! While the rest of the shirt has straight stitches the fabric seemed really stretchy to me and, being the beginner I am, I chose a zig-zag stitch. I figured this would allow for a little more give.
This looks pretty straight, right? Sure.
Once it was all sewn up I slipped it on and tried to determine where the emblem and buttons would go. I tried to actually measure it out to make sure it was even but in the end I best guessed it. I laid that foam down with some tape and attached it. I had earlier made some practice runs with the sewing machine and yes, one can sew through the foam without ripping it into shreds.
The hardest part of this whole process was that little circle. I knew it would be. I can't sew in a circle and despite the horrible luck I'd had with the test runs I decided to give it a try. I'm foolish that way.
Disaster. I don't even know why I went that far. I still blame the mess on the weird texture of the foam. That's my story. I took out the stitches and devised a new plan. I would have to hand sew it. Have I mentioned how terrible I am at hand sewing? So bad. I am apparently worse at this, though, so I gave it a shot.
I tried to remember the blanket stitch and, wouldn't you know it, I didn't quite remember it as well as I thought. This is my modified version. Not perfect in anyway, but I doubt I'm going to walk into that bowling alley and some one's going to point out the weird stitching. They may just be wondering why a girl dressed as Robin is in a bowling alley. I can't wait for that.
Oh! There's that green shirt. Don't have to do a thing to that other than wear it. Which I did. I was walking around in my house in this (and the belt, tights, and shorts...) for probably half an hour. I was modeling it for Michael and it just took me awhile to change back into my mild-mannered alter ego. These things happen.
Cape next!
xoxo
Stephanie


This comment has been removed by a blog administrator.
ReplyDelete