08 June 2011

Yo-Yo T-Shirt


Awhile back a friend gifted me with a few articles of clothing that she no longer needed and/or no longer fit. This shirt was one of them. I love the soft grey color, but the sleeves were always a little loose down by my wrists. When I wore the shirt I usually rolled up the sleeves to my elbows. Then I had a thought about the last t-shirt reconstruction I did. If I could cut the sleeves off that shirt, why not this one?

So I did.


07 June 2011

Chocolate-Dipped Coconut Macaroons


These. Are. So. Good.

These cookie were an unexpected treat I made last week (yes, I'm behind on my blogging. Expect a lot of posts this week as I play catch up) due to the fact that I had shredded coconut in my house and I never have shredded coconut in my house. I'm thinking of making it a staple from now on.

If you like macaroons, I promise these are amazing. They may also be one of the the easiest cookies I've ever made. There are only four ingredients!
  • 3 large egg whites
  • 1/2 cup sugar
  • 1/4 tsp. salt
  • 1 14 oz. package of sweetened flaked coconut


Looking at that picture you may be thinking "Hey. That doesn't look like a full package of coconut." It isn't, but there was still enough to make the cookies.
See, I had made some granola early in the week that needed just a little coconut and I had most of the bag left over to do something with. In case you're wondering, the granola needs work but it was edible.
The first step is to preheat the oven to 350 degrees and line baking sheets with parchment paper. Then, in a large bowl whisk together the egg whites, sugar, and salt until frothy.

Yum. With a fork, or spatula like I used, mix in the coconut nut until moistened.

Pack the mixture into level, tablespoon amounts and drop onto baking sheet. Bake until golden, about 25-30 minutes. I checked mine at 20 minutes and they were perfect. Know your oven.
Once they were cooled I made up some ganache; because I had some cream I wanted to use up and chocolate-dipped macaroons sounded amazing. Ganache is also ridiculously easy, but here's the recipe for anyone who would like it.
4 oz. semi-sweet chocolate, finely chopped
1/2 cup heavy cream
First, chop up that chocolate as fine as you can. This will help it to melt more evenly. Place it in a heatproof bowl. Next, bring the cream to a boil over medium heat in a saucepan. Pour the cream over the chocolate and let it sit 10 minutes. Stir the mixture gently until fully incorporated. The ganache should appear glossy.
After I made that I dipped the cookies half-way into the ganache and placed on waxed paper. I did not get any good shots of this process, but you can imagine. Then they're all done!
I took these to work and they were gone within an hour; and that was even with the cupcakes that someone else had brought in. Those were not gone in an hour, but to be fair, there were more cupcakes than cookies.
xoxo
Stephanie
*recipe from Martha Stewart. Again.

02 June 2011

My Little Terrarium


I will be the first person to say it: I am not a gardener. I leave all outdoor (oh heck, indoor too) plant life to my boyfriend. He enjoys it much more than I do and, thus, takes greater care.

Something weird happened, though. I suddenly got it into my head that I wanted to make a terrarium. The idea of planting something in a glass case sounded pretty cool and I love how they look. So I hunted around at thrift stores looking for glassware that came with a lid. The lid was important to me; it was all about my vision.

I did finally find what I was looking for... sort of. I found a long, ugly cylinder glass with a fantastic lid, so I decided to buy it anyway. I took the measurement of the opening in the cylinder glass and found a fun circular bowl that worked perfectly. 

Next part of my vision was the plant; I needed something low maintenance if  I was going to do this. Browsing through the local farmer's market one Saturday morning I found a dainty little succulent. It was beautiful.


30 May 2011

Bringing the May Flowers


Cupcakes!
I had mentioned awhile back in this post that I was going to start taking Wilton cake decorating classes at my local Michael's craft store. It has been great fun so far and I've already signed up for the next class.

These cupcakes were our third lesson and the most intense. There were three different flowers to make (four if you consider star drop flowers and swirls drop flowers vastly different), along with leaves. May I just mention how much I love making leaves? Seriously, I could decorate a cupcake with just leaves. It would look a little funny, I suppose, but it could be great. They're so easy and can really finish a look. If I had another super villain party it could work... Poison Ivy cupcakes. Oh, the leafy possibilities.


Filling the cupcakes was something else we learned during this lesson and that was really easy too. These particular cupcakes were lemon flavored filled with lemon curd. The cupcakes themselves were not spectacular, in my opinion. I tried a new recipe and was not impressed with it. Everyone else who ate them enjoyed the cake; the cupcakes were dense yet moist and tasted like lemon so I shouldn't complain considering that's what they were supposed to taste like. They didn't satisfy me, though, so I won't be sharing that recipe here.

26 May 2011

T-shirt reconstruction


Ever since I got my sewing machine I've been cutting up all kinds of t-shirts. I can fix shirts that are too big or fix something that isn't quite right.

Today I'm taking an old long sleeve and turning it into something frilly and girly. I love this shirt because it's comfortable and it fits well. Unfortunately, I got some bleach on the sleeve. Never good, especially with black.


I found a couple of cute t-shirt tutorials online but my favorite was from Ruffles and Stuff. She has some really cute ideas over there. The first step of this process was simple. Fold the shirt in half and cut off the sleeves to a desired length. The shirt is folded to make sure that the sleeves are cut evenly.

21 May 2011

Adventures in Gluten-Free Baking

I love having company over. It's a lot of fun and I make a lot of food. One of the greatest joys I get from baking is the happiness it brings to other people. Unfortunately, some of these people can't eat what most others can. Namely: gluten, eggs, or dairy.

As I mentioned in my last post, I had a house guest last weekend that needed her own specialty cake. It was interesting for me to bake this way; very different. There were some challenges (guar gum is harder to find than the much more expensive xanthan gum) and uncertain moments (don't know how I feel about those fake butter sticks...) but overall, it turned out great.

 For the cake I used the same chocolate cake recipe from Martha Stewart that I used before in this post, but changed it up a bit.


Instead of regular butter I used Earth Balance vegan buttery sticks, almond milk instead of cows milk, applesauce and baking powder took the place of eggs, and I found some gluten free flour and guar gum. I'm glad I found the guar gum in bulk because I only needed a little bit.

Just a little note: I used 1/4 cup of applesauce plus 1 tsp of baking powder per egg. It worked really well.

15 May 2011

Ity-Bity Cake Stand

I have had the busiest week. First there were finals, I started my cake decorating class, and then my boyfriend graduated with his Bachelor of Science (whoo!) This of course meant there was family in town and I'd have eight people in my house, myself included. There was a lot going on. What does this have to do with the blog; aside from excuses for the lack of posts? Well, let's keep going.

I make a lot of tiny cakes. There's only two people in my household and making a large one would be excessive. So that's just fine and dandy but something that's been starting to get to me is the fact that these little cakes look so silly on my nice cake stand.


See what I mean? Not so majestic sitting up there. It's like wearing clothes that are too big, it's not flattering in the slightest.
The thing is, though, that I'd never had a real reason other than vanity to have a little cake stand. The large one does a fine job of displaying my cakes and there was no need for anything more.

That time has come.

In planning to host these seven people at my humble abode for a couple of meals I also planned to bake a cake! What kind of host would I be if I didn't? One that didn't serve cake, obviously.
So wouldn't one full sized cake be more than enough? Normally, this would be true, but one of my guests has some allergies and she'll be getting her very own tiny gluten and dairy free cake!

Now that the big stand will be host to a butter and wheat flour cake I'm going to need something else to display the tiny one.

I know that there are many do-it-yourself cake stands out there, but this is a first for me.

For this project I gathered
  • A dry erase marker
  • Small glass dish
  • Small glass cup-thing
  • Adhesive
  • Q-tip, one cotton end cut off
  • Ruler


This is a great project, and super cheap. The glassware cost me $1.50 at the thrift stores. Clean it up and it's perfect! 

02 May 2011

Bonsai Tool Roll-Up Bag


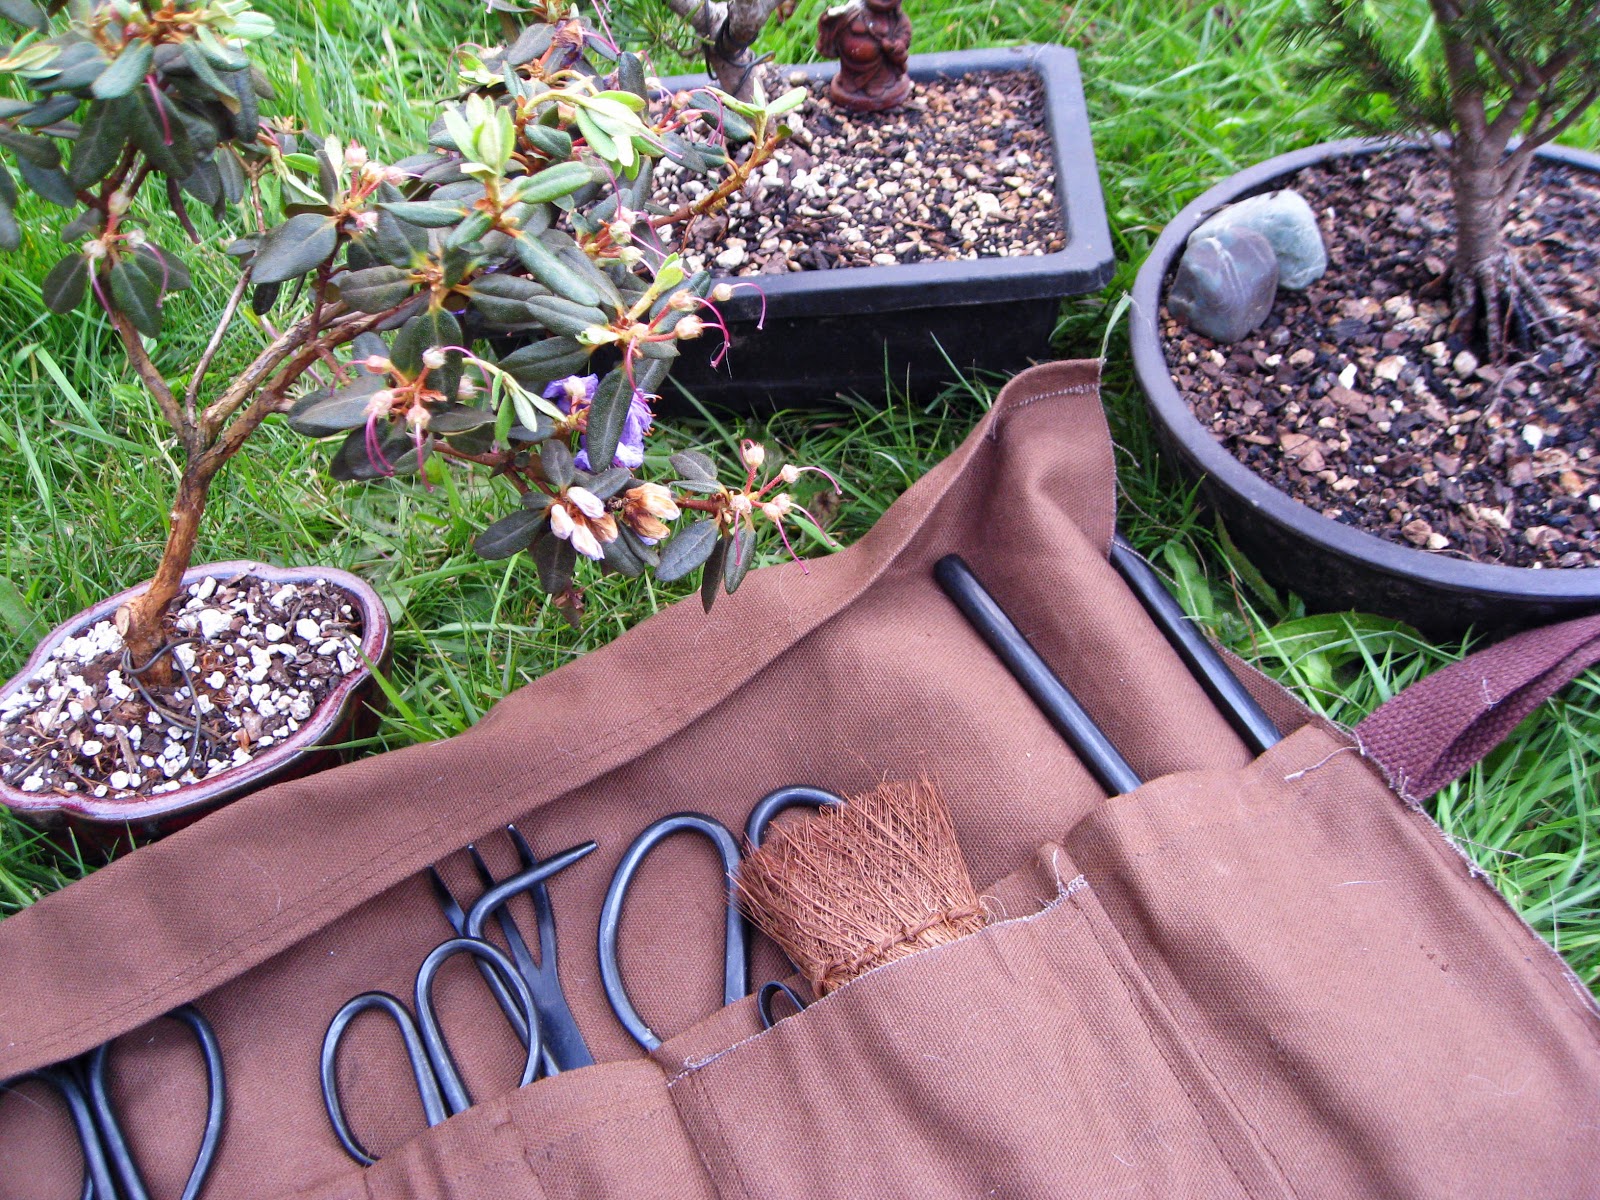
Bonsai trees are amazing, aren't they? Itsy-bitsy living trees. In my home we have six. At the moment they're all new and at that beginning stage. One day they'll be fully grown, tiny trees. You see, my very talented boyfriend has just started this tree hobby and has taken quite a liking to it. I never realized before just how much goes into the whole process. Root trimming, branch shaping; a lot of time and energy goes into these.

I like to encourage hobbies so last Christmas bought him some actual bonsai tools. They came in a little cardboard box and he was ecstatic. However, we started thinking that the tools needed something more permanent than that little cardboard box. I took upon myself to do something about it.

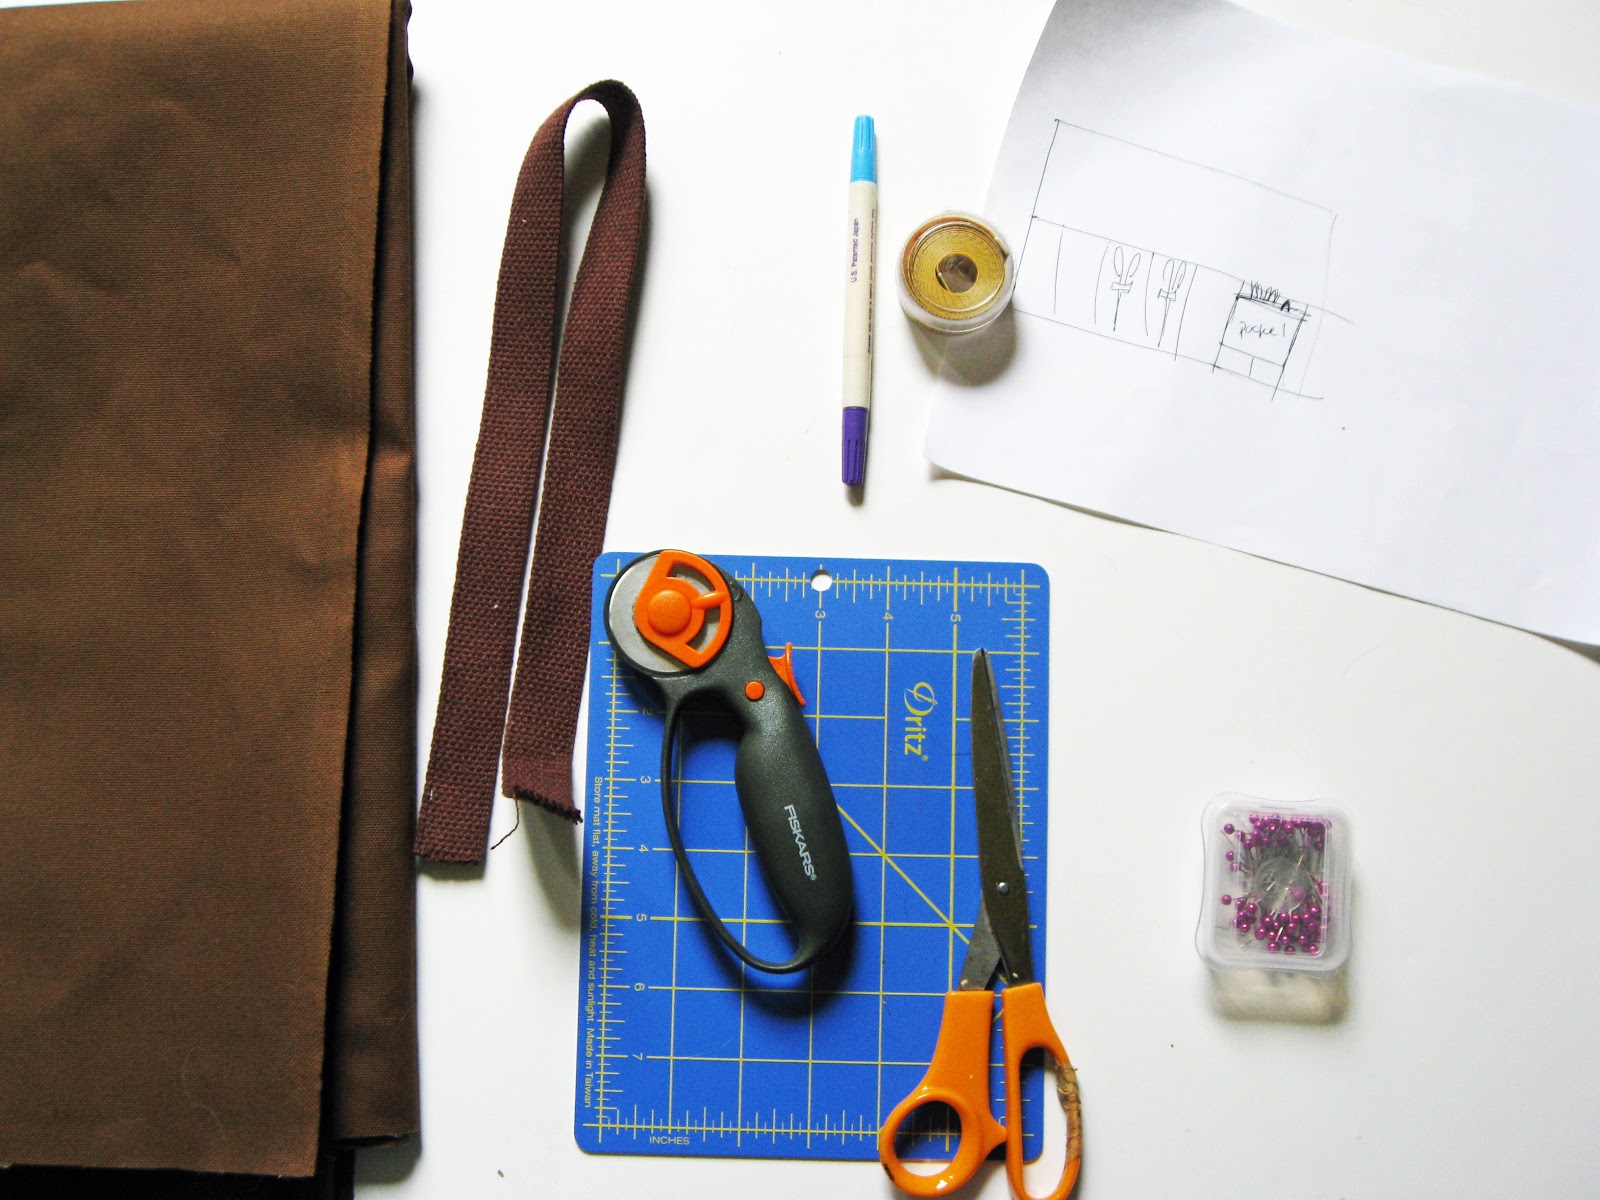
The design was basic enough so I sketched up an idea and got some materials together.

  • Canvas
  • Straps
  • Cutting board
  • Rotary Cutter
  • Fabric scissors (which I did not have at the time but have since purchased. Good decision on my part)
  • Fabric marker
  • Pins


See how simple my drawing is? Easy stuff. 

The first step was to figure out how long I wanted it to be when it was all rolled out and how wide. I then folded up the bottom to form a flap. This was where I'd be stitching up pockets. I got a little too into the project and didn't take a picture. You'll see what I mean in the next part.

I cut out some rectangular pieces that I wanted to be extra pockets, folded up the edges and pinned them to the flap, being sure I didn't pin them to the back of the bag.